

First off, I printed out the designs for my magnets. I used Amy Sumrall's super cute kits, Oh So Happy, Berry Sweet and Little Bunny Foo Foo.
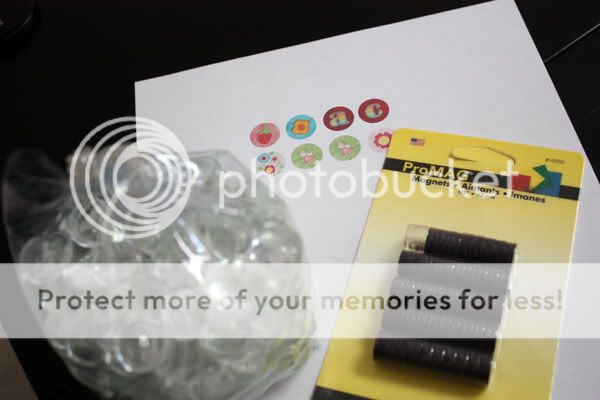
I printed on normal paper and cut the designs out. Then, I applied a thin layer of Mod Podge on the circles as I normally do for sealing, but this time I put a glass marble on top. I liked that you can still move around the paper to center it properly, but then the Mod Podge dries off pretty quickly as usual.
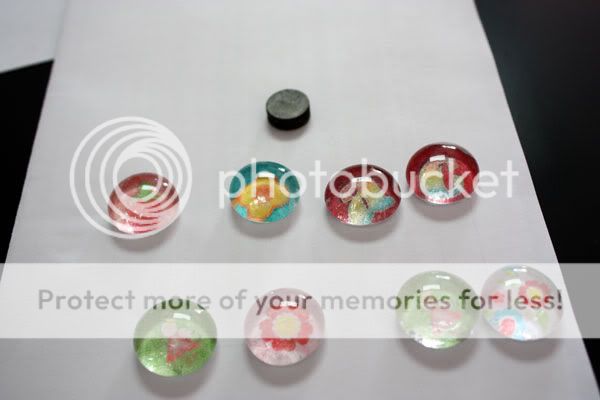
Then, I used some tacky glue to glue the magnets to the paper+glass marbles. I just put a drop of tacky glue on the magnets and adhered the paper+glass to them. These need to dry a bit longer than Mod Podge, but within 10 minutes my magnets were ready to go on the fridge!

The glass marbles magnify the design below and the final effect is so pretty! Even DH appreciated the final result! :)

I put off this project for a really long time because I wasn't sure which glue would work for attaching the magnets, but in the end the glue I had worked beautifully! I'll be doing more of these for sure. ;)


1 comment:
Cristina.. they are amazing! Love the idea AND your results.. so adorable! Thanks for showing the materials and describing the process (I asked for this on TDC.. but now I got it *lol*)
{love} Sylvia
Post a Comment