Showing posts with label Tutorials. Show all posts

Monday, January 4, 2016

DIY Double-Sided Leather Traveler's Notebook Cover

Today I want to share a little DIY project I made last month - a double-sided leather traveler's notebook.


I am not going to post a step-by-step tutorial because in fact I followed the instructions by the excellent Christine, with just a small change -  rather than a regular size traveler's notebook, I decided to make a passport-sized one. This is my first traveler notebook and I made it with the purpose of carrying it in my bag when I go to work meetings, and I wanted something more compact. The bonus is that from 2 sheets of letter-sized leather I was able to make 2 notebooks, one for me and one for my mom. :)

Now... I'm not gonna lie - it took forever to put together (mainly because I didn't have the right tools to thread the elastic!), but it was worth it - I love how it turned out!


The notebook is double sided, and even though when I bought the leather (these are pretty much the entire color option at Michaels) I thought I'd be using the aqua for the outside, I ended up falling in love with the texture of the brown leather and chose that instead. :)
I have two notebooks in my journal.


The notebook on the left was made by me, while the one on the right is a Midori passport - I bought it after the fact, and it turns out that the notebook I made is spot on!
I used yellow copy paper for the notebook made by me and I love the pop of color!
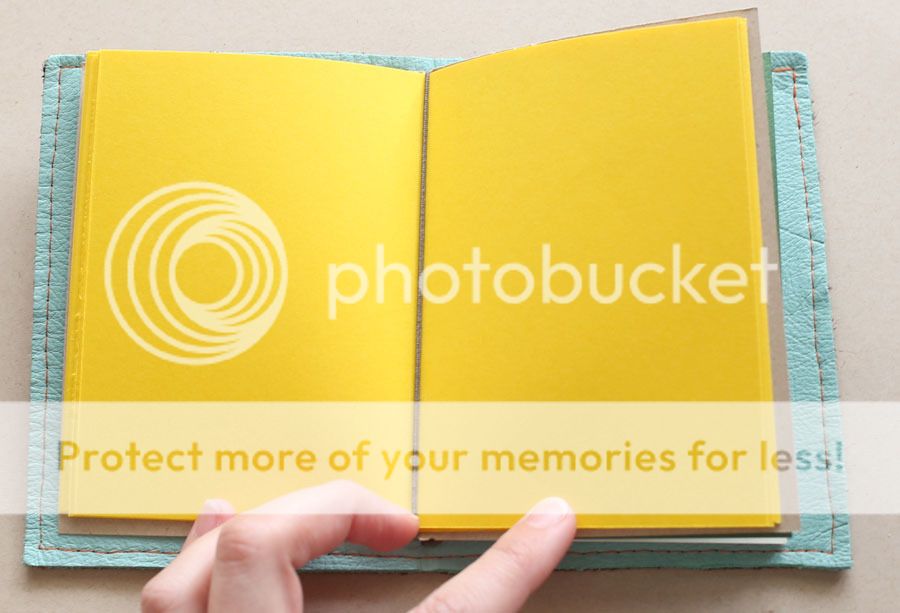

I chose not to bind the notebook and it's really quite freeing to know I can just get rid of a page if I mess up.


Here's a closeup of the stitching, which I did with my sewing machine but turning the wheel by hand (I didn't trust my sewing skills for this project!):


The stitching holds the two pieces of leather together pretty well (in fact the only change I would make in Christine's instructions is to skip the fabric interfacing step - I found it didn't really stick properly in my case).
The pretty charm was given to me by my mom a few years ago and is by Thun.
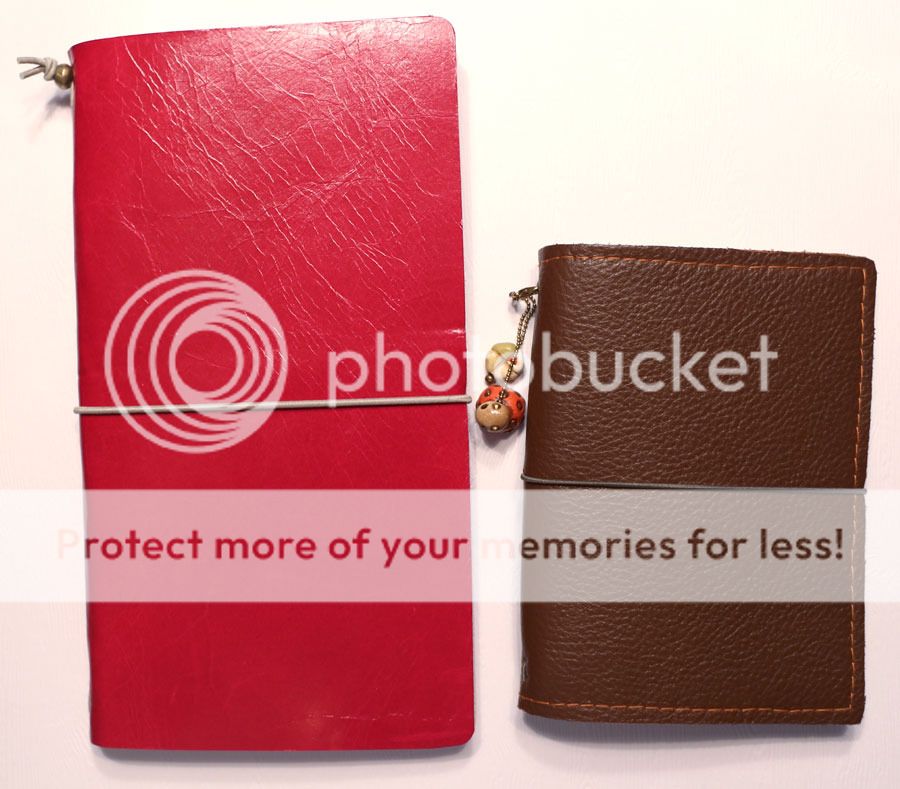

This passport size has been working really well for me, and it made me take the plunge and purchase a full sized traveler's notebook as well - I would love to try my hand at scrapbooking in that size, so stay tuned... ;)

Thursday, September 18, 2014

Letterpress and Scrapbooking

Hello! I am sharing here the post I made yesterday for the write.click.scrapbook blog on letterpress. I just started letter pressing last week, and I am in love! A while back I showed you how to create a faux letterpress look using embossing folders, but today I want to show you how to do real letter pressing.
Here is what you will need:
  • Die cutting machine. I have a Big Shot.
  • Letterpress platform. I have seen people who say they can letterpress just by adding some cardstock shims and the regular cutting pads, but I didn't want to have to guess every time so I bought the platform - and I have no regrets! Especially since letterpress paper is pretty expensive and I don't want to waste it on trials.
  • Letterpress paper. The type of paper you use is critical to get a deep impression and get the most out of your letterpressing. I know some crafters have great results with watercolor paper, but that has not been the case with the watercolor paper I had on hand, so letterpress paper it is for me. 
  • Letterpress plates. There are many designs available, I'm sure you'll have fun picking your favorites!
  • Ink. To be honest, I have not tried letterpress ink just yet. I've heard horror stories about how hard it is to clean up, so I started going the easy way, and I have just used ink pads for now. :) The examples on this page use distress ink pads (I love the bright colors). I also love doing blind impressions (no ink) as I think adding the ink detracts a bit from the deep impression. More recently, I tried pigment inks and also letterpress inks - the cleanup isn't really that bad as long as you use the convenient wipes that come in the letterpress kit, and the coverage is the best!

With the idea of putting a page together, I made two letterpressed cards using plates from Studio Calico.
Letterpress_web
For the card on the left I used the picked raspberry color, and I added spiced marmalade for the card on the right to get an ombre effect.
I used the Poet Society kits by Studio Calico for my page. Using the letterpressed cards, it was very easy to build a design using my photo and some strips of patterned paper. I added some stamping with grey ink to tie to the background paper, and completed the page with some gold splatters and sewing. 
Today-BackToSchool_web
Here are a couple detail shots.
Today-BackToSchool-det1_web
Today-BackToSchool-det2_web
I hope this has inspired you to give lettepress a try - I love how easy it is to put together a page starting from a couple of letterpressed cards. Share your creations in the comments! I'd love to hear your tips too, as I am just starting out myself.

Sunday, November 20, 2011

Hybrid Christmas Tree Tutorial

In this tutorial I will be showing you how to make a paper tree. I love three dimensional hybrid projects, but I'm always pressed for time during the holiday season, so I selected this project because it is especially easy to make but yields an impressive result. This project was inspired by Martha Stewart.

Photobucket

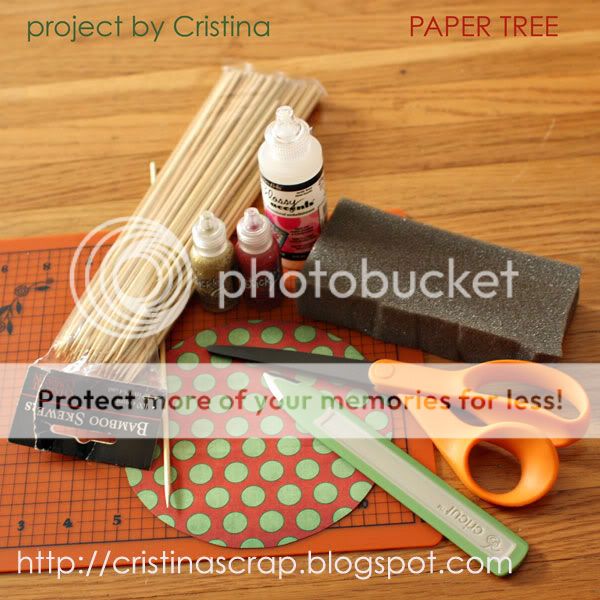
In addition to being fairly quick, this is also a thrifty project; chances are you already have all that's needed in your home right now. You will need digital supplies (I used the kit "Once Upon a Shabby Christmas" by Haynay Designs), matte presentation paper, printer, scissors, bone folder, bamboo skewers, up-cycled foam from shipping packaging, hot glue gun or Glossy Accents, and optional decorations like glitter glue, buttons, sequins, etc.

Photobucket

If you look at the completed project, it might be hard to believe that it's made only of paper circles, but that's exactly all it is! I have used circles of 2", 3", 4", 5" and 6" diameters. If you want to make a smaller tree, skip the 6" circle.

Once you have printed out the circles (I used matte presentation paper for this project), cut them out. Your cuts don't have to be precise, so it will be very quick to cut the circles out. Here are the steps for making your Christmas tree:
1. Start with one paper circle.
2-4. Fold it in half using a bone folder.

Photobucket

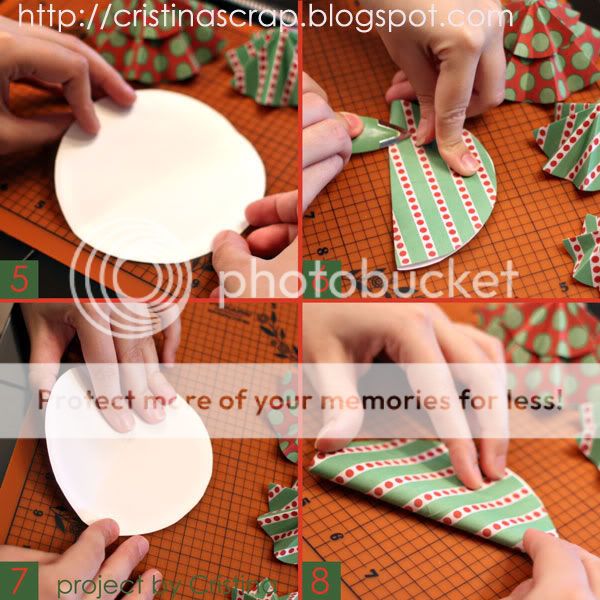
5. Open up the circle.
6. Fold it in half again, at 90 degrees with the previous fold.
7. Open up the circle.
8. Make another fold in between one of the previous folds.

Photobucket

9. Make a fourth fold, at 90 degrees with the latest fold.
10. You have made four folds, so your circle now has 8 equal segments.
11-12. Now we're going to fold the circle inside out and make four more folds, in between the first four.

Photobucket

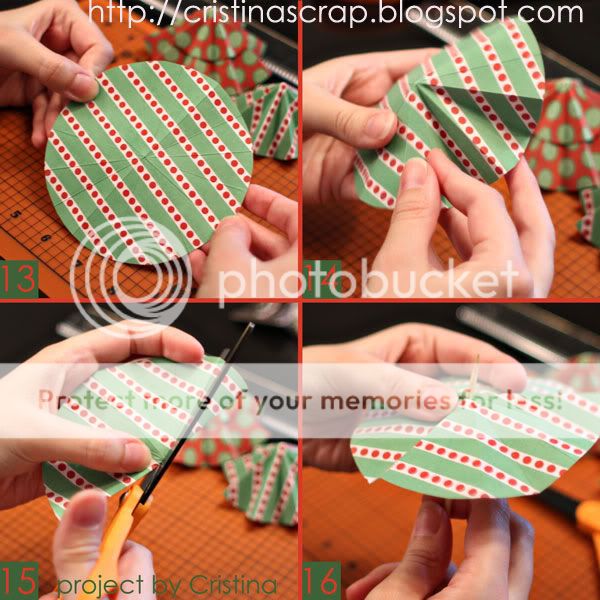
13. Once you have completed the 8 folds, the circle is divided in 16 equal segments.
14. The folds are alternating, one towards the inside and one towards the outside.
15. Cut a small hole at the center of the circle.
16. The size of the hole has to be big enough for the skewer to fit through.
Repeat steps 1-16 for all the paper circles you have.

Photobucket

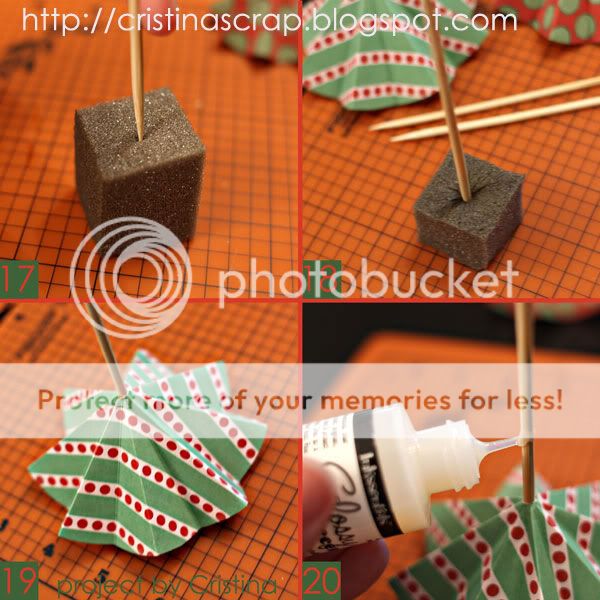
17-18. Cut a piece of foam shipping material into a cube and poke a hole in it with the skewer.
19. Insert the biggest folded paper circle onto the skewer.
20. Apply glue (hot glue is the easiest; I don't have a hot glue gun so I used Glossy Accents - you will have to hold the paper in place until the glue dries) on the skewer in correspondence of where you want the next smaller paper circle to go.

Photobucket

21. Insert the folded paper circle and hold in place until the glue dries.
22. Repeat for smaller folded circles.
23. Cut the skewer after you have added the last folded circle.
24. Decorate the tree top as you wish. I used Stickles glitter glue.

Photobucket

The tree is ready! You can decorate it further if you wish, using more glitter or fake snow or beads.

These simple paper trees make such a festive decoration! You can use them as place holders for the Christmas table or to decorate the house for the season - the possibilities are endless, and nobody will ever believe they were so easy to make!