In this tutorial I will be showing you how to make a paper tree. I love three dimensional hybrid projects, but I'm always pressed for time during the holiday season, so I selected this project because it is especially easy to make but yields an impressive result. This project was inspired by Martha Stewart.
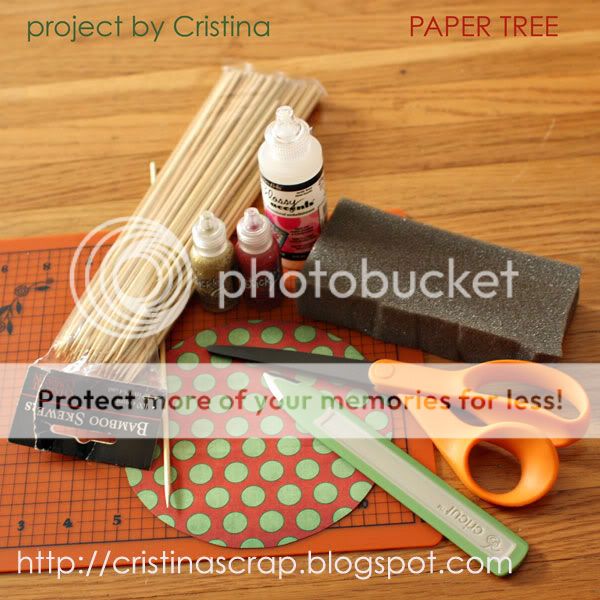
In addition to being fairly quick, this is also a thrifty project; chances are you already have all that's needed in your home right now. You will need digital supplies (I used the kit "Once Upon a Shabby Christmas" by Haynay Designs), matte presentation paper, printer, scissors, bone folder, bamboo skewers, up-cycled foam from shipping packaging, hot glue gun or Glossy Accents, and optional decorations like glitter glue, buttons, sequins, etc.
If you look at the completed project, it might be hard to believe that it's made only of paper circles, but that's exactly all it is! I have used circles of 2", 3", 4", 5" and 6" diameters. If you want to make a smaller tree, skip the 6" circle.
Once you have printed out the circles (I used matte presentation paper for this project), cut them out. Your cuts don't have to be precise, so it will be very quick to cut the circles out. Here are the steps for making your Christmas tree:
1. Start with one paper circle.
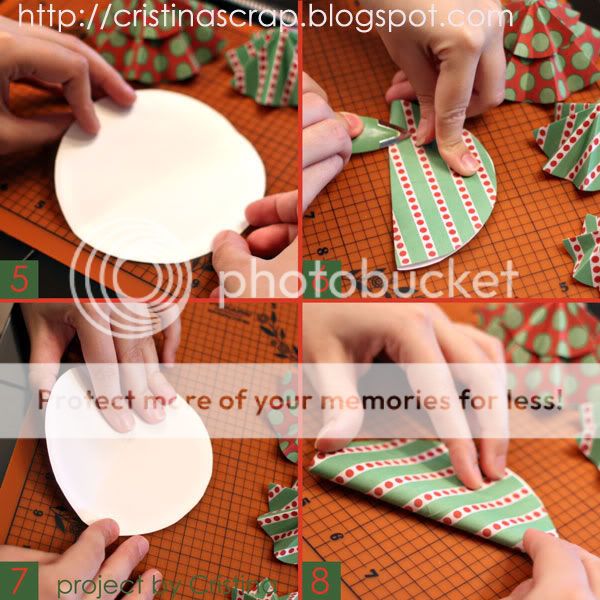
2-4. Fold it in half using a bone folder.
5. Open up the circle.
6. Fold it in half again, at 90 degrees with the previous fold.
7. Open up the circle.
8. Make another fold in between one of the previous folds.
9. Make a fourth fold, at 90 degrees with the latest fold.
10. You have made four folds, so your circle now has 8 equal segments.
11-12. Now we're going to fold the circle inside out and make four more folds, in between the first four.
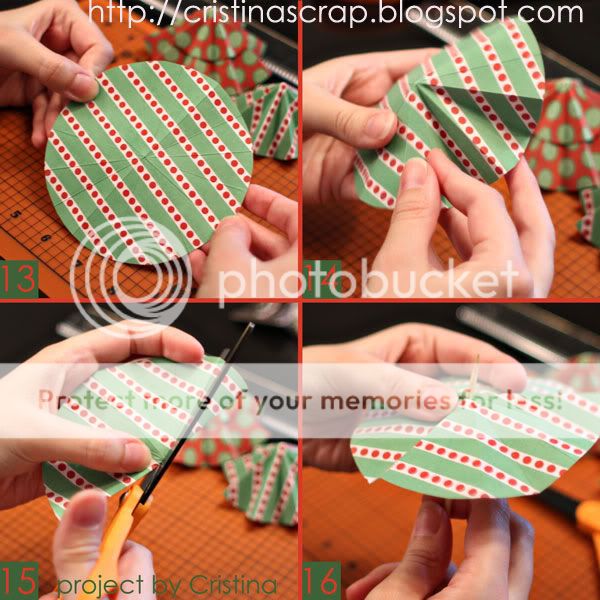
13. Once you have completed the 8 folds, the circle is divided in 16 equal segments.
14. The folds are alternating, one towards the inside and one towards the outside.
15. Cut a small hole at the center of the circle.
16. The size of the hole has to be big enough for the skewer to fit through.
Repeat steps 1-16 for all the paper circles you have.
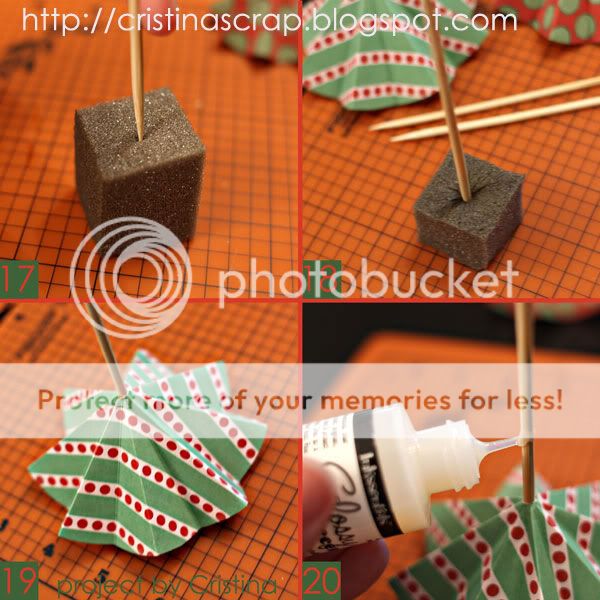
17-18. Cut a piece of foam shipping material into a cube and poke a hole in it with the skewer.
19. Insert the biggest folded paper circle onto the skewer.
20. Apply glue (hot glue is the easiest; I don't have a hot glue gun so I used Glossy Accents - you will have to hold the paper in place until the glue dries) on the skewer in correspondence of where you want the next smaller paper circle to go.
21. Insert the folded paper circle and hold in place until the glue dries.
22. Repeat for smaller folded circles.
23. Cut the skewer after you have added the last folded circle.
24. Decorate the tree top as you wish. I used Stickles glitter glue.
The tree is ready! You can decorate it further if you wish, using more glitter or fake snow or beads.
These simple paper trees make such a festive decoration! You can use them as place holders for the Christmas table or to decorate the house for the season - the possibilities are endless, and nobody will ever believe they were so easy to make!
Subscribe to:
Post Comments (Atom)


3 comments:
Just a quick note to let you know that a link to this post will be placed on CraftCrave today [21 Nov 02:00am GMT]. Thanks, Maria
Fantastic tutorial Cristina - I just love how it all came together, these trees are just so festive and fun!
Just a quick note to let you know that a link to this post will be placed on CraftCrave today [22 Nov 02:00am GMT]. Thanks, Maria
Post a Comment